Showing posts with label WILD WASABI. Show all posts

Wednesday, December 5, 2012

The Greeting Farm - Glimmer Bean? Rainbow

Hi again! I crafted last night, and wanted to share my efforts -
I started out by colouring up my stamp using my Spectrum Noir Markers, and then trimmed out this cute TGF image out, and built my card, I used plain coloured cardstock to build my card, as I wanted the image to really stand out! I used a range of SU! colours (Real Red, Tangerine Tango, Daffodil Delight, Wild Wasabi, Marina Mist and Wisteria Wonder) And cut out a bunch of circles, to create my border. I added a touch of glitter using some glitter cardstock, and a smattering of buttons, and bling/resins. Here is a close up 
I am entering this card into three challenges, the first is the Double Take Tuesday challenge at Splendid Stamping, which is Rainbow, next up is the Anyone For Anya, Buttons challenge, and last but certainly not least, is the Mojo Monday sketch - 270, which of course, I've flipped.

Sunday, June 24, 2012

Kraftin' Kimmie - Tallulahbelle

Hi Hi! Just a quick post here before I head to bed... I'm almost completely unpacked (woohoo) and had some time to craft... which resulted in a card you'll see tomorrow, and this card -
I started by colouring Tallulahbelle up using my Spectrum Noir Markers and the cut out her out using my nesting circles. I sat her aside, and picked out this fun paper to use. I layered it up on white cardstock and then onto a Wild Wasabi card base, and popped my fairy image circle on top.... She seemed to disappear a bit, so using the tutorial from Some Odd Girl on colouring clouds I gave it a whirl, using my Spectrum Noirs instead of Copics. For my clouds, I used Ice Greys - IG1, IG2 and for the darkest part IG4, for the sky, I used True Blues - TB1 and TB2. I then layered up the main image circle on to a slightly larger circle and tried it on the patterned paper again. She no longer looked lost! (WOOHOO!) I love this as an easy, cleaner alternative to sponging sky, and will no doubt use it again! I then decided she needed some bling, so I cut out a circle using some glitter paper, and also a butterfly. I then stamped the sentiment from Tallulahbelle, but omitted the "I", then layered it up onto the larger, glitter circle...I then finished off the card with some silver rhinestones in the top right and bottom left corners :)
Here are the colours I used to colour the Fairy -

I am entering this into three challenges, the first is the Tuesday Morning Sketches Challenge, and secondly the Kraftin' Kimmie Challenge 134 (I was lucky enough to be picked as last weeks winner, woohoo!) And, finally to The Corrosive Challenge, which is Summer Girls
KKStamps Store!

Thursday, March 15, 2012

Stampin' Up! Fresh Vintage and Friends Never Fade


Hey Hey! (I recently went back through a bunch of my posts, and realised most of them start with "Hi There", so changing it up a bit!) I have a quick layered card to share today! I rarely use more than two or three layers on my cards, so this one was a bit of a deviation for me! Including the ribbon, there is 10 (!) layers on this card!!
.
I started off with a Crumbcake base, layered with Blushing Bride and then some heavily stamped Vanilla. I stamped it with the flower image from Sale-a-bration set Fresh Vintage, and the En Francais Background stamp in Crumbcake and sponged the edges. Next I cut out a scallop circle in Crumbcake, and a Circle Nestie in Very Vanilla, which got the same treatment as the background. I added two layers of ribbon, the bottom layer is the Ribbon Carousel's Vintage Seam Binding ribbon in Leather Tan, and some pretty pink ruffled ribbon. The next layers are the image/sentiment which is from Friends Never Fade, and has been stamped in Wild Wasabi and layered on to Vanilla and then Crumbcake, this was popped on with a bunch of dimensionals. I added three paper roses in pink and three pearls to finish off this card.
I am entering this into three challenges, the first is the sketch over at The Ribbon Carousel, next is the Tuesday Trigger from Moxie Fab World and finally, the Bit O'Green challenge at Simon Says Stamp challenge blog. 
 
 
Simon Says Stamp 
We're about half way until my blog candy is drawn, so do get in before the 31st :)

Wednesday, December 21, 2011

Stampin' Up! Whimsical Words and I create a Thank You card

At this time of year, I find I need a lot of Thank You cards among my Christmas cards, so I sat down and made this one today
I used a More Mustard card base, then layered it up with some Whisper White. The main image panel is the Stampin' Up! Builder Wheel Polka Dots, which I unmounted it to make it easier to use, I cut out a border using Wild Wasabi card and mounted it behind the polka dots. I then cut out two circles, one in Whisper White, the other in Wisteria Wonder.  I stamped the sentiment, from retired set Whimsical Words in Wisteria Wonder (there are a lot of W's in this paragraph!) Then with some mustard felt, I cut out 2 rolled roses using a new addition to my Big Shot, which is a rolled rose die. I stuck them down on two Wild Wasabi leaves cut out using the 2-step bird punch. A little bit of twine finishes off this card. 
I took inspiration from a new challenge blog that is extremely popular so far, Runway Inspired Challenge, I have been inspired by the colours, the mustard, dark green, white and pop of purple (what is with those glasses?) I was also inspired by the actual catwalk, while I haven't used stripes, but instead I've used polka dots. I also used the sketch from Cardabilities , and finally, the Ribbon Carousel Challenge which was to use Twine.
Thanks for dropping by!

Saturday, December 3, 2011

Stampin' Up! Medallion and Snow Swirled and I create a Christmas Card

Hi guys, I have a card to share... This card was heavily inspired by Jules from Jules Krafti Krafts. I loved her card which can be found here. I was inspired by the use of the Medallion stamp as a wreath and using the Wild Wasabi Embossing Powder, which as you can see in my card, matches perfectly with the card stock and ribbon in the same colour.... now onto the card!
I have used a real red base, which I have layered with Very Vanilla (it looks white in this picture!) which I had run partially through the Stripes embossing folder. I wrapped some retired Wild Wasabi ribbon around it before sticking it down. The main image was inked using VersaMark and then I liberally covered it in Wild Wasabi Embossing Powder (got it all over the desk and everything!) once it was heat set, I cut out some berries using the Owl punch and stuck them on to the wreath. The sentiment is from the Snow Swirled set, and I think it fits perfectly inside the wreath... I added some red stickles to the berries to match the shininess of the embossing powder, layered the sentiments onto the wreath and then the main image panel onto some Wild Wasabi card. Here is another photo, which doesn't have the shininess showing, but still annoyingly looks white instead of Vanilla *sigh* 
I am entering this into the Simon Says Stamp anything goes challenge and the Do You Stack Up? ribbon challenge
Thanks again for popping by, and Happy Stamping!

Monday, October 10, 2011

Stampin' Up! Delicate Doilies and 2 Step Bird Punch create a Birthday Card

Hi Again!
I have a super bright birthday card to share with you today :)
This is a white card base, layered with pieces of Island Indigo, Melon Mambo, Rich Razzleberry and Wild Wasabi. I stamped these pieces in VersaMark using Delicate Doilies and the Medallion Background stamp and then embossed them using white embossing powder. I then cut a piece of Marina Mist and layered a piece of white on top, I stamped the sentiment (from Upsy Daisy) and then using my 2 step bird punch, cut out the bird in the same colours as the background. A little bit of twine finishes off this card. I am entering this into the Card Patterns Sketch
Thanks for dropping by! 
I have another card to show you, a much more CAS card, so be sure to come back a bit later :)
Happy Stamping!

Monday, September 26, 2011

Stampin' Up! Growing Green and I create a Sympathy card using a Brayer

Hi guys! I had a lovely weekend with my family, as it was my niece (Brianna 4 months old) and Samuel (22 months) had their Christening, and my lovely older sister asked me to be their Godmother! I was so humbled that she and her husband and asked me. I don't have any photos yet of the day... Hopefully soon! So, I didn't get much of a chance to craft over the weekend... Although, I do have a card to share today :)
Ok, so this is a Early Espresso card base, which has been layered with Very Vanilla (the littlest bit poking out) I then got out a piece of Gloss Card stock and with my brayer coloured it in using Certainly Celery, Pear Pizzazz, Lucky Limeade, Wild Wasabi and Old Olive. Once I'd got the colour variation I wanted, I stamped the leaf from Growing Green in Early Espresso and the sentiment from Because I care.
I am entering this into the CAS-ual Friday Almost Monochrome challenge.
Thanks for stopping by!
As always, Happy Stamping!

Thursday, September 15, 2011

Stampin' Up! Because I Care, with Stampin' Write Markers

Hi guys,
I'm back again with a new card to show you :)
A very clean and simple, one layer card... makes me just a little happy.... I used Crumbcake base, stamped the hydrangea from Because I Care, which is a retired hostess set I didn't ink up nearly enough when it was current! I stamped the image and sentiment using Staz-On. I then got my Stampin' Write markers out in Bashful Blue, Marina Mist, Night of Navy, Certainly Celery, Wild Wasabi and Old Olive and coloured in the flower and leaves layering the colour from lightest to darkest. When the image was coloured, I went over some of the sections with my white gel pen to give a little bit of highlighting. 
I am entering this into the OLW Challenge which is to make a one layer card using colouring in on your card. Thanks for dropping by!
Happy Stamping!

Sunday, August 7, 2011

Stampin' Up! Look Who's Turning and I create a kids birthday card

I'm back again with a cute kids card to share... I made this one last night before bed.
I started with a Whisper White base, layered with Bashful Blue and a piece of Tempting Turquoise Designer Series Paper from the Brights stack. I have stamped another piece of white with the little octopus from Look Who's Turning in Bashful Blue and Tempting Turquoise, and on a separate piece I stamped him in Pear Pizzazz and rock and rolled in Wild Wasabi, I then cut him out very carefully and added him to the other piece using dimensionals, I also stamped the party hat from this set in Basic Grey, cut it out and added it to his head with a rhinestone for the pom pom. The sentiment is stamped is Pear Pizzazz and has been cut out using the Modern Label Punch. I have layered the main image on some Basic Grey.
I am entering this into two challenges, the first is the Colour Q challenge, which can be seen below. As I am still waiting on my Stampin' Up! order that includes Lucky Limade (a new in colour!) I have substituted the colour. The second challenge is the Inkspirations Sketch challenge.
Thanks for stopping by!
Happy Stamping....

Saturday, August 6, 2011

Stampin' Up! Basic Phrases (retiring) and I create a Birthday card

Hi! I have a clean and simple card to share with you today! It uses one of the sets I got in my Stampin' Up! starter kit, and I've only just fallen in love with... Unfortunately, it is retiring at the end of the month....
So, this is a Crumbcake card with a layer of Daffodil Delight and then a layer of Whisper White. I stamped, and heat embossed these lanterns from American Craft in Black and then coloured them with my Stampin' Write Markers and Blender Pen on Watercolour paper. I have used Wild Wasabi, Melon Mambo and Daffodil Delight. I cut them out and popped them on the white which I have wrapped some twine around. I then finished this card off with the sentiment Celebrate from Basic Phrases in Basic Grey. I will be sad to see this versatile stamp set retire in 24 days, but there is still time to get yours! 
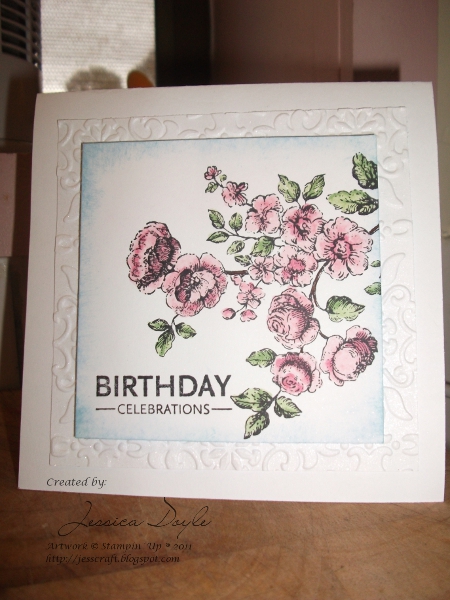
Anyway, this is being entered into the Embellish Magazine colour and colouring challenge. 
I also wanted to share a pic of me today, I am trying to embrace the fact that I have frizzy hair that does its own thing.... Also, I got new glasses last month....
Until next time!
Happy Stamping!

Friday, August 5, 2011

Stampin' Up! I {Heart} Hearts and I create an Encouragement card

Ok, I know I'm supposed to be doing uni work, but as I was having a coffee break (any excuse will do) inspiration hit! I think my mojo is here for a little while, so I'm not going to turn it away :)
This card created itself, it really did! I started with a Pear Pizzazz base, layered it with a piece of Melon Mambo Designer Series Paper from the Brights stack and a piece of Regal Rose card. I stamped the sentiment from Whimsical Words (retired) in Versa Mark then heat embossed it in Black. I stamped a bunch of hearts from I {Heart} Hearts in Regal Rose, Melon Mambo and Pear Pizzazz, I cut them out and arranged them on the card using pop dots to add some dimension. I then wrapped a piece of Wild Wasabi stitched ribbon (retired) around the base and tied a knot. I finished it off with three rhinestones in opposing corners.
I am entering this into two challenges, the first is The Stamp Spot Sketch challenge, which is a brand new monthly challenge. The second challenge is the Play Date Cafe colour challenge, which makes me think of summer (not difficult considering the BEAUTIFUL weather we are having!)
Ok, so that's me for now... My little sister should be here soon and then it is grocery shopping for me (blergh)
Happy Stamping!

Sunday, July 24, 2011

Stampin' Up! So Happy For You and I create a Monochromatic Birthday Card

Hi! I have spent the last few hours in my craft room water colouring... I find it is such a relaxing past time, now that I'm getting my head around using the Stampin' Write Markers as watercolour markers.... Here is one of the images I have coloured and made into a card...
This little cutie is from My Favourite Things and it was great fun colouring her in... I don't know why I chose greens, but any way... The Stampin' Write Markers I have used are: Blush Blossom, Chocolate Chip, Crumbcake, Basic Black, Old Olive, Wild Wasabi and Certainly Celery. I have cut her out and mounted her on Very Vanilla cardstock with a piece of Certainly Celery shaped using my Scallop Border punch and a piece of Wild Wasabi Ribbon (this one is retired now) I have mounted the image panel onto some Wild Wasabi Card and before attaching it to my card base, I stamped the sentiment from So Happy For You, a retired Sale-a-bration set in Wild Wasabi. 
I am entering this into three challenges, the first is the Less is More challenge, to use Ribbon or Buttons on a CAS card, the second is the Jac-inks Monochrome Challenge and the Card Patterns Sketch (below)
Well, it's almost 2am here, so I'm calling it a night.... 
Happy Stamping!

Sunday, July 10, 2011

Stampin' Up! Just Believe and I create a cute Thank You card

Hi again! I know I have been quiet... I have been busy again this past week... June and July are apparently really busy months for me... I have crafted again though!
I have made this little card, and was unsure if I liked it or not... But, now that I'm looking at it again, I really do like it. The base is Riding Hood Red, which has been layered with a piece of Designer Series Paper that has been in my stash FOREVER! I have used the direct to stamp Stampin' Write Marker Technique on this lovely grass feature from Just Believe, in Riding Hood Red and Wild Wasabi. The sentiment and frame have been stamped using the same technique and stamp set. I have then cut out the frame very carefully and popped it up on dimensionals. 
I really like this stamp set, and it is one I have been lusting over for quite some time, so to get it recently was very exciting.... I am entering this into two challenges... The first is the Stamping 411 Sketch Challenge, the second is the Color Throwdown Challenge.
Thanks for dropping by,
Happy Stamping!

Wednesday, July 6, 2011

Stampin' Up! Awash with Flowers and I create a bright Birthday card.

I spent today celebrating with my house mate, as it was his 28th birthday, but after he went to bed (he has to work early tomorrow), I went into my craft room and had a play around. I found a great video online on awesome backgrounds here. Here is my take on this card
I have only used white cardstock for this card! The coloured panels are made using my Stampin' Up! Inks and some sponges.... I have used Tempting Turquoise and Night of Navy for the blue section, then the pink section is Melon Mambo, and a touch of Poppy Parade. I then stamped my flowers from Awash with Flowers on a separate piece of card and coloured them using my Stampin' Write Markers, in Daffodil Delight, Wild Wasabi and Certainly Celery. I have popped the leaves using dimensionals and the sentiment is from the retired set Whimsical Words. I am entering this into the Card Patterns Sketch Challenge...
Until next time, 
Happy Stamping!

Monday, June 6, 2011

Stampin' Up! Just Believe and I create For You Cards

Hi all! I had a wonderful coffee catch up with some friends today, and when I arrived home, I realised I hadn't posted this card yet....
This uses one of my favourite sets from the Catalogue, one which I don't actually own just yet. I asked my friend Sue to bring it around when we had a craft day with Kim last week.  This is one of those stamp sets that I have seen so much done with, but every time I go to order it, its place gets taken by something else I need on the list. My card is fairly basic, but I think packs quite a punch. The base is Crumbcake, followed by Tempting Turquoise which has been stamped tone on tone with the circle element of Just Believe, then I have layered a torn piece of Perfect Plum stamped with the leaf image, tone on tone again. My main image is the grass and flower mix, which I have coloured using my Stampin' Write Markers using the direct to stamp method. I have used Rose Red, Wild Wasabi, Perfect Plum and Tempting Turquoise, stamped on to a piece of torn Very Vanilla. The sentiment is from the same set, and punched using the Decorative Label Punch in a new way. I have punched it again in Rose Red and layered them on top of each other, and popped using some Dimensionals. 
I am super happy with how this card turned out, and will definitely be buying it in my next order. Over the coming few days, you may see some changes taking place on this blog, as I tweak it a little, so if you arrive and it looks odd, that's why....
Until next time, 
Happy Stamping!

Monday, May 30, 2011

Stampin' Up! Elements of Style makes elegant Birthday Cards

I told you I'd be back! I got a Stampin' Up! order in the mail this morning, and in it was a stamp set I have had on my wish list for a while, but seriously had to get after my Upline held a class using it! I bought Elements of Style, and this is the first card I inked it up for....
This is a 5" square Whisper White card, which is layered with an embossed piece of Whisper White, using the Big Shot, and the Vintage Wallpaper Impressions Folder, I have lightly sprayed it with some Glimmer Mist, but I don't think it is visible in this picture. I have stamped the flowers in Staz On Black and coloured with my Stampin' Write Markers, Pink Pirouette, Pretty in Pink, Certainly Celery and Wild Wasabi. I have then sponged the square with Bashful Blue, and Baja Breeze. The sentiment is from Upsy Daisy, and fits well in the corner. 
I am entering this into the Less is More Sketch Challenge, while the proportions are off, I think it still fits in with the sketch. I am also entering this into The Paper Players Anything Goes challenge. 
I have another card to show you, using this same set, but a completely different outcome! So, come back in a few hours, to see it 
Until then....
Happy Stamping!

Thursday, May 5, 2011

Stampin' Up! Awash with Flowers and I create a Thank You Card

Just a quick one before I head to bed....
This card was made tonight, purely because I was bit annoyed, and water colouring helps me deal with stress, I must admit, it is something I need to improve upon, as my technique isn't very good (read non-existent), so although it relieved the stress, I'm not overly happy with this card... I have used the 2 step stamping set Awash with Flowers, which comes with outlines and a solid stamp, but, for this, I have used only the out lines.  I coloured the images with my Aqua Painter and my Stampin' Up! ink pads, in Wild Wasabi, Pacific Point, Real Red and Rich Razzleberry. I have also used the Stampin' Up! Designer Series Paper Stack in the Brights collection, which is a great buy at only $37.95 for 40 sheets, what's even better, is it matches with all the Stampin' Up! colours perfectly!
I am entering this into the Stampin' Royalty colour challenge, 
I think I will have another play with these colours at a later date...
Thanks for stopping by, and as always, 
Happy Stampin!

Saturday, March 26, 2011

Stampin' Up! Because I Care and I make Thank You Cards

Sorry it has been quiet on the blog front, but with some dramas happening and then falling ill, I have been completely uninspired to create anything.
This clean and simple card uses the stamp set Because I care, which is a level one hostess set, either host a workshop with sales totals of $300 or purchase product of $300 to receive this set for free! I have stamped the Hydrangea in black in and then coloured it in with my stampin' write markers. I am entering this into the Just Add Ink just add stamps challenge, which was to just use stamps, ink and cardstock, no extra embellishments.
Thanks for looking, and happy stamping!

Monday, March 14, 2011

Stampin' Up! Ornate Blossom is very versatile, Christmas Card and Thank you Card

Ok, so this is another couple of cards from our craft day last week. This time, the colour combo was one I struggled a little bit with.... So Saffron, Elegant Eggplant, Rich Razzleberry, Wild Wasabi and Early Espresso. 
So, I clear embossed the damask pattern from Bliss on the Early Espresso cardstock, then coloured the ornate blossom with my stampin' write markers, then stamped it on to some very vanilla. I wanted to add some depth to the colours, so went over selected parts with my markers for definition. The sentiment is from Short and Sweet (one of my all time favourite sentiment sets) and is cut out using the Modern Label Punch. The ribbon is retired SU, Wild Wasabi. 
Ok, after making these cards, Kim and I sat looking at the Ornate Blossom stamp, thinking, there has to be more that we can do with this.... Kim was looking at the stamp upside down, and brilliantly noticed it looks like a pine cone.... So, we moved on to doing a Christmas card each. This one was not colour combo'd at all, just use the stamp...
I chose to use Cherry Cobbler, and Whisper White. I embossed half the White with the Polka Dots Embossing Folder, and left the other half un-embossed. The image was stamped using Cherry Cobbler, and then I glued down some loose silver glitter. The ribbon is non-su, but is a perfect match for Cherry Cobbler. The sentiment is from Snow Swirled, and I think fits perfectly. 
Check out what Kim did with the colour combinations, and this stamp set! Next time you have a stamp that doesn't seem to work, look at it from another angle, you may find something surprising...
Happy Stamping!

Sunday, March 13, 2011

Stampin' Up! Tropical Party and I create Summer inspired cards

Hi all!
I'm back again with some more summery cards... as we are moving into Autumn here, it seems weird that I've had a sudden flash of summer inspiration... I blame the weather, it isn't autumny yet, still quite summery
I am entering this card into the Less is More challenge, which was to make a one layer card which was off the edge. I have used a few ink colours with the leaves, and the masking technique to get the leaves to sit 'behind' the flowers. The sentiment is from Upsy Daisy, and is a very versatile in what style it can be used on. I like how this card turned out. 
The second card I have to show you, utilising the stamps from Tropical Party, is one I made on Wednesday with Kim, it is actually an almost direct case on a card I made a little while ago. 
This time, I embossed the trees in black, and chalked instead of inked the background. The sentiment is also different, this time using the Sale-a-bration set So Happy For You, which I don't use nearly enough... Anyway, the football is going to start soon, and I have to get some uni work done before settling down to watch the game... so, until next time
Happy Stamping!