Showing posts with label DSP. Show all posts

Wednesday, May 30, 2012

Tickled Pink Stamps for Shabby Chic Card

Hi! I had a quick play in the craft area before work this morning, and really went outside my comfort zone.... (okay, so it's not purple.... so not completely outside my comfort zone) come see -
I started out colouring my image, which is from Tickled Pink designs. I found her 'trench coat' really hard to colour, so decided to paper piece it instead. I have used my Stampin' Write Markers and some retired Stampin' Up! DSP for the coat. I cut her out and then built my card. The base is So Saffron, layered with Crumbcake which I ran through the Big Shot with a circles embossing folder. I sponged the edges, and then sewed around it (messily.) The centre panel is a piece of Pretty in Pink layered up with some patterned paper from Echo Park (I think) and some lace which I have stitched in place. I pierced two holes in the top of the centre panel and threaded some twine through and tied a bow. The sentiment is from Stampin' Up and is called Friendly Messages and has been stamped on to a Spellbinders Label. I added 4 little pearls to finish off this card. 
I am entering this into two challenges, the first is the Tuesday Morning Sketches sketch and next up is The Corrosive Challenge 'shabby chic' challenge  

Wednesday, May 16, 2012

Some Odd Girl - Tweet Kaylee for a Hello Card.

Hi again!
Yesterday, I went into work early, so I was home by midday (wooh!) and after napping, decided I really needed to craft.... So, I printed out a digi image that has been in my stash a while and coloured her up -
This is Tweet Kaylee, and she was printed directly on to my watercolour paper. I then used my Stampin' Write Markers to colour her in, being careful to avoid the printer ink (it will smudge.) I then fussy cut her out and set her aside to create the rest of my card. The base is White card, layered up with bright yellow paper from Echo Park and some retired patterned paper from Stampin' Up. I then tied a big bow using Ivory Horizontal Stripe ribbon from Ribbon Carousel  *swoon* and stamped my sentiment "hello" using my Basic Black Marker. I added some red rhinestones to finish off the panel and popped Kaylee up on a whole bunch of dimensionals!
I am entering this into three challenges (cause I needed a lot of help with this one) the first is the Ribbon Carousel Sketch which I have edited slightly to fit my image, next up is the colour challenge for The Paper Players and last but not least is the Bright Colours challenge over at Some Odd Girl.

Monday, February 13, 2012

Brayering with Stampin' Up! Inks for a Get Well Card

Hi guys, I had a lovely relaxing weekend at my parents house this past weekend, and I have a card to share with you, which I made up for a dear family friend who is awaiting surgery.
I did some brayering while at mums, and it was nice to get back into it, after not doing it for a few months. I used Pool Party, Tempting Turquoise and Island Indigo on Gloss Cardstock. Then, with some new stamps bought from Lincraft :) I stamped the grass (?) images in Staz On. The sentiment is one from mums stash cut out with my nestabilities and trimmed down and mounted on black cardstock. The patterned papers are Tempting Turquoise from Stampin' Up! It's a fairly basic card, but I like how it turned out. 
I am entering this into the Freshly Made Sketches sketch. :)
Thanks for popping by!

Thursday, February 2, 2012

Stampin' Up! Tempting Turquoise Embossing Powder to decorate Chipboard.

I have to admit, I buy things thinking "oh yeah, I'll use that..." and then they collect dust for ages! Three of the items on this layout are like that... First is the Tempting Turquoise Embossing Powder, then the Fabric from Stampin' Up! And, finally the chipboard. I bought a bunch of Chipboard a while back, with all good intentions, but I really struggle to use it! Anyway, onto the page
So, I used some patterned paper as the background for this (This is a momentous occasion! You should notice I don't usually use a whole page of patterned paper, Ever!) I think it is from Kaisercraft Seaside Collection. I lined up where all my photos needed to go, added some Real Red Patterned Paper (DSP Brights Stack), and the sat with my chipboard embellishment, thinking what to do... I came up with this- 

Smooshed (technical) my VersaMark ink pad all over this chipboard swirl and piled on the Tempting Turquoise embossing powder, and then heat set it. I put it onto the layout, and felt it was missing something, so with some tiny flat back self cover buttons, and Stampin' Up! Designer Series Fabric, I made some embellishments. I also made one a bit bigger and stuck it on too. Then, it came to a title... I think my nephew is just the cutest little guy on the planet, and he will be breaking girls hearts in no time.... So, that's what my title is all about... I used inspiration from Mariah Carey's song Heartbreaker, for this layout (so I can enter it into the Daring You to Scrap Challenge) I'm also entering this into the Anything Goes Challenge at DYSU Challenge Blog
Thanks for popping by!

Monday, November 7, 2011

Stampin' Up! Dasher and Snow Swirled and I make a non-traditional Christmas card!

Hi guys! I made a card this morning, before having to head into work this afternoon.... I was on the phone to my mum the entire time I was making this!
This is an Early Espresso card base, which I have layered Regal Rose Patterned Paper Stack DSP on, which I popped a piece of Pear Pizzazz on top of and some white ribbon which was left over from a shirt that I pulled apart... (hey, it's still ribbon!) the rosette was made using some patterned paper from My Minds Eye, and this tutorial from one of my favourite design blogs... I stamped Dasher on my circle in Regal Rose and popped him on top of the rosette. I stamped the sentiment from Snow Swirled on the Regal Rose Patterned Paper and added a few basic rhinestones to finish this card off. 
While I was on the phone, Tommy, my big white cat came walking into the craft room, and meowing at me.... I ignored him, until...
Yup, that's my craft desk, and he is sitting exactly where my card and scratch paper was 5 seconds before this photo was taken... I guess Tommy doesn't like to be ignored... 
I am entering this card into the Moxie Fab Championing Award Medallions Challenge
Thanks for dropping by! 

Stampin' Up! Upsy Daisy and I create a Vintage Thank You Card

Ok, so I'm not really a vintage card maker, it has something to do with the fact that I like my cards to have nice clean lines and not overly embellished.... but, I made one that I'm quite happy with :)
This is a Soft Suede card base, which has been sponged around the edges, I have added a strip of Daffodil Delight Pattern Stack Designer Series Paper which was also sponged with Soft Suede to tone it down a bit... I then focused on my main image panel, which has been embossed and sponged, using the Emboss Resist technique, which has come back into fashion :) I used the Upsy Daisy silhouette and sponged it in Peach Parfait, Daffodil Delight, and Soft Suede. The text stamp is from my stash, and I thought it worked well with the vintage theme I was going for. I stamped my sentiment, using my Stampin' Write Markers to selectively stamp only half the sentiment, from Upsy Daisy. I attached a little bit of vintage vanilla lace, and a button to finish this card off.
I am entering this one into two challenges, the first is the sketch challenge over at The Sweetest Thing, and secondly to a new one for me, Simply Stampin'  Challenge, which was the colourse Peach Parfait, Daffodil Delight, Soft Suede and Very Vanilla
I also have another card to show you in this post, one that has Stampin' Up! card stock, but the rest from other companies on it...
This is a Whisper White card base, which I have layered with Baja Breeze and Crumbcake. The teddy is my favourite, he is a Tatty Teddy stamp I bought a while ago, but this is the first time he's made it onto a card! The wording is from one of my dear craft friends, who owns a Cricut... 
I am entering this card into the Card Patterns sketch... which, I think if you turn it on it's side, it kind of looks like... I sat there with the sketch next to me, so I tried :)
Ok, that's all from me for tonight...
Happy Stamping! And, don't forget my Blog Candy!

Monday, October 31, 2011

Stampin' Up! Vintage Vogue and I create a Thank You Card

I'm back! The postman arrived with some stamps I'd bought from a friend in the states, so I had to play with them... This card is my first time using anything by Papertrey Ink... *in love*
This is a fairly basic card.... I used a Crumbcake card base, layered it with some retired Stampin' Up! Designer series paper, and a piece of vellum. I stamped the sentiment from Vintage Vogue on a piece of scrap Vanilla, and Island Indigo ink. The butterfly is from Papertrey ink, and has been cut using the matching die, and stamped. I then water coloured him using Bashful Blue, Marina Mist and a tiny little bit of Tempting Turquoise with my Stampin' Write Markers and a blender pen. 
I am entering this into the Clean & Simple sketch challenge, and the Simon Says Stamp anything goes challenge
I'll be back later with one more card :)
Happy Stamping!

Wednesday, October 19, 2011

Stampin' Up! Snow Swirled and Basic Phrases make a really cute Christmas Card!

Hi Guys! Apparently I have been in a "Red" Mood lately..... My last three cards have been red! Here is one I made yesterday :)
Ok, so I started by colouring in this little The Greeting Farm stamp with my Stampin' Write Markers, and a Blender Pen. Then, I built my card around her... I have used Real Red Designer Series Paper (Patterns Stack). Silver stamped snowflakes from Snow Swirled (say that 10 times quickly) then sponged the piece a little with more Real Red Ink... I have wrapped a piece of Seam Binding Ribbon around it, and tied a bow. The sentiment is from Basic Phrases, and layered onto the decorative label punch in Chocolate Chip. I added a few rhinestones to finish it off.
I'm entering this into three challenges, the first is the Friday Mashup, to make a easel card or use snow flakes,..... I chose to use snowflakes... The second challenge is the CR84FN colour challenge, which is Red, Brown and Kraft. The third challenge is the sketch from Mojo Monday
Ok, thanks for dropping in! I will be back later hopefully with another (non red) card :)
Happy Stamping!

Wednesday, October 12, 2011

Stampin' Up! Top Note Die and I create a stamp-less card!

Ok, so you guys know by now I have a huge stamp addiction yes? Well, I've been eyeing off the UnstampaBelles challenge for a few weeks now, and finally had an idea I wanted to play with...
Ok, so this is a fairly basic card, but I have to ease myself in to cards with out stamps... I have used the Top Note Die on the top section, in My Minds Eye paper, and some Basic Black card. I then layered it onto some White and added some faux stitching. I placed some rhinestone flourishes and then using a little birdy chipboard, traced it onto some Tangerine Tango Designer Series Paper and cut him out. I used some dimensionals to stick him to the image panel, and then mounted the whole kit and caboodle on to a Basic Grey card base... 
This card not only fits the UnstampaBelles challenge of Autumn and stitching (I was inspired by autumn colours), it also follows the sketch from The Stamp Spot, and the colours from ColourQ.
Thanks for dropping by!
I have a regular stamped card to show you too, come back later! :)
Jess

Saturday, September 17, 2011

Stampin' Up! Party this Way and Brights Designer Series Papers make a fun Birthday card

Hi guys! I have made two cards yesterday, but didn't have a chance to share them with you.... here is the first one...
For me, this card isn't a favourite, and I don't actually know why.... I love the bright colours, with the splash of black, but I just feel it didn't come together as it should have in my head.... On to the details though...
I used a Vanilla piece of card, and layered on some designer series papers from the Brights stack in Old Olive, Tangerine Tango, Daffodil Delight, Real Red and Rich Razzleberry. I stamped the candles from Party this Way and cut them out using my circle punch. I stamped the sentiment and popped in underneath the circle. A touch of ribbon, and some bakers twine finishes off this card.
I am entering this into the Lollipop Ladies challenge, which has it's inspiration as Everlasting Gobstoppers :)
I took my inspiration from the colours mostly, and the circles in the polka dot paper and candles.... 
I also took inspiration from Got Sketch?
Thanks for dropping by, I'll be back in a bit to share another card, one I'm happier with :)

Tuesday, September 6, 2011

Stampin' Up! Tiny Tags, and Scallop Rolled Roses on a cheery Hello card

Hi again, tonight after making dinner, I headed into the craft room, and struggled (a lot!) to make a card I was happy with... but, eventually I succeeded...
I started off knowing I wanted to use the newest sketch from Card Pattens, but little else. I didn't know what I wanted to go in the circle element, what colours, embellishments or even stamps that I wanted to use... So, after a bit of experimenting, I decided to colour this darling little girl from My Favourite Things, and paper pieced her top. I then figured as I'd paper pieced, I knew I could enter it in to The Lollipop Ladies challenge, so I took inspiration from the cupcakes, pulled out some Crumbcake card stock, made a card base layered some Rich Razzleberry and Tempting Turquoise for a fun colour palette, while not being the same as those in the cupcakes gives me the same fun impression... I rolled some scallop roses, and one out of a circle, which I have posted a tutorial to here, and cut out a little leaf using the Bigshot and Little Leaves sizzlet. I used Tiny Tags and matching punch to create a sentiment and popped it just behind the roses, peeking out. A row of rhinestones finished off this card nicely... I am also entering this in the Simon Says Stamp and Show Stamptember hop!
Thanks for dropping by, 
Happy Stamping!

Monday, August 15, 2011

Stampin' Up! Just Believe and I create a sweet Friendship card

I made a card that wasn't a total struggle! YAY!
This is a Crumbcake base layered with Daffodil Delight Patterns Designer Series Paper stamped the image from Just Believe in Crumbcake and layered some scalloped border in white and Daffodil Delight (am I the only one that noticed that rhymed?) I then stamped the frame in Daffodil and stamped the sentiment, Friends in Crumbcake. I stamped the frame once more on Crumbcake and cut it out and used some pop dots to layer it over some yellow and white Bakers Twine. A bit of faux stitching and some distressing finished off this card!
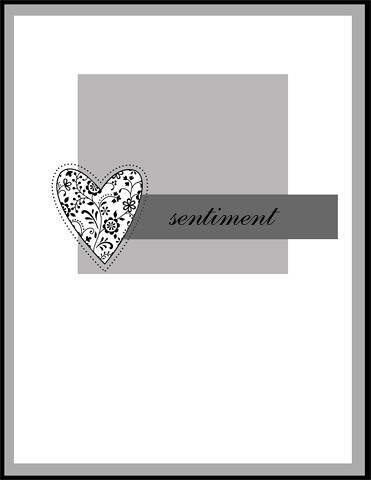
I am entering this into three challenges.... The first one is the Card Patterns sketch (below), the second is the CR84FN colour challenge, one I really enjoyed (below again) then the Dream Valley Challenge which is to use distressing... 
Thanks for popping in, I'm so happy that I created, and it came easily! So, pop into these challenges, and have a go!
Happy Stamping!

Sunday, August 7, 2011

Stampin' Up! Look Who's Turning and I create a kids birthday card

I'm back again with a cute kids card to share... I made this one last night before bed.
I started with a Whisper White base, layered with Bashful Blue and a piece of Tempting Turquoise Designer Series Paper from the Brights stack. I have stamped another piece of white with the little octopus from Look Who's Turning in Bashful Blue and Tempting Turquoise, and on a separate piece I stamped him in Pear Pizzazz and rock and rolled in Wild Wasabi, I then cut him out very carefully and added him to the other piece using dimensionals, I also stamped the party hat from this set in Basic Grey, cut it out and added it to his head with a rhinestone for the pom pom. The sentiment is stamped is Pear Pizzazz and has been cut out using the Modern Label Punch. I have layered the main image on some Basic Grey.
I am entering this into two challenges, the first is the Colour Q challenge, which can be seen below. As I am still waiting on my Stampin' Up! order that includes Lucky Limade (a new in colour!) I have substituted the colour. The second challenge is the Inkspirations Sketch challenge.
Thanks for stopping by!
Happy Stamping....

Friday, August 5, 2011

Stampin' Up! I {Heart} Hearts and I create an Encouragement card

Ok, I know I'm supposed to be doing uni work, but as I was having a coffee break (any excuse will do) inspiration hit! I think my mojo is here for a little while, so I'm not going to turn it away :)
This card created itself, it really did! I started with a Pear Pizzazz base, layered it with a piece of Melon Mambo Designer Series Paper from the Brights stack and a piece of Regal Rose card. I stamped the sentiment from Whimsical Words (retired) in Versa Mark then heat embossed it in Black. I stamped a bunch of hearts from I {Heart} Hearts in Regal Rose, Melon Mambo and Pear Pizzazz, I cut them out and arranged them on the card using pop dots to add some dimension. I then wrapped a piece of Wild Wasabi stitched ribbon (retired) around the base and tied a knot. I finished it off with three rhinestones in opposing corners.
I am entering this into two challenges, the first is The Stamp Spot Sketch challenge, which is a brand new monthly challenge. The second challenge is the Play Date Cafe colour challenge, which makes me think of summer (not difficult considering the BEAUTIFUL weather we are having!)
Ok, so that's me for now... My little sister should be here soon and then it is grocery shopping for me (blergh)
Happy Stamping!

Wednesday, July 27, 2011

Stampin' Up! Thanks for Caring and Beautiful Wings Embossolit make Get Well Cards easy!

I have been sitting in my craft room today, avoiding doing work for university, I succeeded in doing any study, and used a set that I haven't used as much as I wanted to when it first came out.
There is a couple of things on this card that will be retiring on the 31st of July, the first is the sentiment which is from Thanks for Caring and the script background which is from my favourite stamp set from the Autumn/Winter Mini catalogue, French Foliage. This card started off as a plain Whisper White card base, I have then used some Designer Series Paper from Elegant Soiree (these papers will leave us on the 31st of August.) I have used some Perfect Plum card and the Eyelet Border Punch which I have tied some Pretty in Pink Grosgrain Ribbon around. The sentiment is coloured using my Stampin' Write Markers in Perfect Plum, Pretty in Pink and Baja Breeze. The Decorative Label Punch has been used on some Perfect plum card which has been stamped with the script stamp from French Foliage. I have cut out some butterflies using my Bigshot and the Beautiful Wings embossolit in Pretty in Pink and sprayed them with a mixture of rubbing alcohol and Shimmer Paint in White, to give them a little glitter. I think the sentiment works really well for a card for someone who is feeling a little under the weather.
I am entering this into three challenges, the first is the Stamping 411 Sketch which I actually struggled a little bit with this week, the next challenge is the SUO Challenge blogs Get Well Theme and finally, my colour inspiration came from Moxie Fab's Tuesday Trigger.
Anywho... Thanks for dropping in!
Happy Stamping!

Saturday, June 18, 2011

Stampin' Up! Motorcycle and I create a Masculine card

I'm back again... I am loving having my craft room back in order, and procrastinating from uni work is a perfect excuse to craft :-)
This card came together quite easily for a masculine card, but then, I think anything with this A la carte (Single stamp, $13.95 +postage) Motorcycle stamp is fabulous! I have used a Not Quite Navy base card, which has been layered with some Old Olive Designer Series Paper (Patterns Stack in Brights) I have popped a piece of Basic Grey in the centre, put some silver brads in the top right corner and a little bit of crochet twine. I main image is stamped on Very Vanilla, in Basic Grey and coloured with my Aqua Painter and Old Olive ink, and shading using Basic Grey, I have then mounted it to some Not Quite Navy and stuck some dimensionals underneath to make it pop!
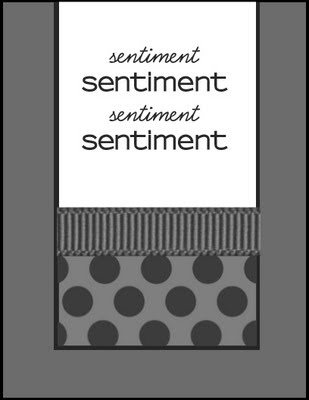
I am entering this into three challenges, the first being Clean and Simple Sketch (turned on its side), the Stamping 411 Colour challenge, and Just Add Ink, Just add colouring. 
Well, this evening is going to be spent watching movies, and relaxing with my best friend and house mate... I might get back in the craft room at some point because another one of my favourite challenges has been released for the week.... 
Happy Stamping!

Friday, May 6, 2011

Stampin' Up! Curly Cute paired with Hope & Strength makes cute Thank You Cards

I've had quite a productive day today, not only making up 2 cards, but getting a good portion of uni work done... I headed back into the craft room this evening, and whipped this up
Anyway, this was made using the Strength & Hope stamp set from the Autumn/Winter mini catalogue, and also the Curly Cute sentiment set. I have stamped the swirl in Pear Pizzazz and then stamped it a second time without re-inking it. I have then stamped the Thank You in Old Olive. I have paired this with Old Olive Designer Series Paper (Brights Stack) and rounded the corners. I added a bow made out of Very Vanilla grosgrain ribbon.
This card is actually being entered into 3 challenges (a lot for me...) the first one being the Clean and Simple stamping card sketch, the brand new CAS-ual Friday Challenge blogs Texting Skills and the Less is More Thank You or Congratulations challenge.
Happy Stampin!

Stampin' Up! Sail Away and Botanical Gazette pair wonderfully for Masculine Cards

Ok, so you all know how much I love (love love) the รก la carte stamp Sail Away...
When I saw that the new Just Add Ink challenge had been posted, I knew I was going to reach for this great stamp. I have used the cracked glass technique, which I will be showing the girls of my stamp club in the next month. It is a great technique, just emboss multiple layers of clear embossing powder. I usually do about 4-5 layers. I then popped it in the freezer when it was still warm from the last layer. Once it has been in the freezer about 10 mins, pull it out and bend your embossed piece, this will give you the cracking. Before embossing this piece, I stamped my image, coloured it, then sponged around the edges to give it a weathered look. 
Ok, onto the other deets of this card...  I have used a Crumbcake base, which I have layered with a distressed piece of designer series paper, from the new Autumn/Winter mini catalogue. This is from the Botanical Gazette collection. I then layered a piece of DSP from the Newsprint collection, which on one of the sheets has a fairly detailed 'vintage' map.... For the circle element on the Just Add Ink sketch, (see below) I used a button from my stash which fits well, I popped a sentiment from Basic Phrases (using this a lot more now...) onto a modern label punch and tied it all together with some twine. 
.
Until next time, 
Happy stamping!