Showing posts with label CHIPBOARD. Show all posts

Tuesday, July 8, 2014

Scrapbooking - Nick and I Sydney Trip

Hi guys! I have another scrap page to share, before hopefully sharing a card tomorrow (if I get a chance to photograph it!)
Here is the layout
For this layout, I started with a black card stock base, and painted up a background using shiny gold paint, and a mask. I then grabbed one of my 3 ink sprays and sprayed some gold around. I added some circles using some white paint on a little plastic lid. I added 4 different patterned papers, from Kaisercraft, and Echo Park, a journalling card from October Afternoon, some washi tape, a flair, paper clip and some twine. The tittle is "Happy" which I coloured using my spectrum noir markers and added some gold paint dots. I added a Kaisercraft chipboard window, which I painted and some flowers from D-Lish Scraps.
Here is the close up collage - 

Friday, April 18, 2014

Lawn Fawn - Scrapbooking my Nephew

HEY HEY!
Happy Easter everyone! I hope your short break (if you get one) is relaxed, filled with family, friends and reflection! (oh, and chocolate!) 
I've got a scrapbook page to share with you today... 
For this scrapbook page, I wanted to keep things quite plain, and focus on these amazing photos of Lachlan, my little Nephew. I printed them off, trimmed them down, and matted them on some patterned paper, this is a really old collection, which I can't even remember who made it! I used a few small off cuts from a Lawn Fawn paper pad, and then stamped and coloured some little dinosaurs from Lawn Fawn as well! I fussy cut them out, and layered things up with a few stickers (My Minds Eye)
Here are some close ups
The Main title - Amazing Smile, was made using a sticker and a chipboard word which I coated in white embossing powder, and heat set twice. 
I added some Studio Calico cork arrow stickers and called this layout done! 

Paper Issues - Pitch Perfect
Word Art Wednesday - Anything Goes #128

Thursday, February 13, 2014

Scrapbooking my Selfies

Hey guys! I've been scrapping, because it's almost always guaranteed to get my craft mojo back! I decided I should scrapbook some more of my selfies, and instagram pics... So, did some printing, and this is the page I created - 
 
I wanted to scrapbook the search for the "perfect" going out top... How my best friend and I spent all day, going to different shops, trying to find a top that I could pair with jeans, and go to dinner and drinks in, and still look dressed up. I didn't find anything I loved, which was a bit disappointing, until, the next day, we went to K-Mart to get cardboard for her daughters school assignment, and I spotted this top! It totally fulfils my requirements for the dressy top to wear out! 
On this page, I've used patterned paper from Carte Bella, and Amy Tangerine, from 6x6 paper pads, and a paper doily, I've added a cluster of embellishments, including a Freckled Fawn frame, a Prima Flower, chipboard bird (painted turquoise), Kaisercraft roses and a flair button. On the other side, next to the journalling, I've used a transparency from Maya Road and a sticker from Amy Tangerine. 
Here is my collage of close ups
Paper Issues - Fill'er up! (Fulfilling my needs)
Word Art Wednesday - Anything Goes #119


Saturday, February 1, 2014

Scrapbooking with D-Lish Scraps

Hi guys! It's time for the D-Lish Scraps - Inspiration Board for February! 
Here is my scrapbook page -
This scrapbook page, I started with some papers, from Pink Paislee, I layered them up, attached my photos (Instagram) and then made use of all the loveliness from D-Lish Scraps!
Including - 
Wooden Bingo Numbers (love these!) 
Chevron Bag (as a background to my photo)
As always, I've used my embellishment clusters to get everything on the page, as well as doodling and a touch of washi tape!
The Just Add Paper Kit is live now too, with everything you need, to create the perfect layout for just $10!
(minus the paper and photos!)  

Monday, January 20, 2014

Scrapbooking with Moustaches!

Hi Again!
I've had a pretty lazy kind of weekend, I didn't do a whole lot of crafting, just a couple of cards for friends, one was a birthday card, the other a new baby card. I'll share them later in the week :)
In the mean time, I do have a scrapbook page to share -
I grabbed this photo, which I've been meaning to scrapbook a while, and some patterned papers, from Bella Blvd and Echo Park, I also grabbed some plain white card stock. I attached my photo, to a basic gray base (SU!) and then attached some embellishments next to the photo. I used a WOW chipboard polaroid frame, a stamped and coloured instagram stamp, a couple of flowers (from d-lish, of course) and the big moustache was given to me, right after this photo was taken. It clips on to a straw, so you look like you've got a mo while sipping your drink!
The journalling is below the photo, and was done with my motex label maker. I added more flowers, a die cut moustache, and a smattering of sequins. 
You can see the close ups below-  
Word Art Wednesday - Anything Goes #115

Thursday, January 2, 2014

D-Lish Scraps - Scrapbooking January Inspiration Board!

Oh my! It's time to share my page for the D-Lish Scraps Inspiration Board challenge!
You all know how much I dislike the colour purple? Yeah, so this one threw me a bit... Right when the DT were putting together their samples, Pantone announced the colour of the year... 
Yup, it's purple!
I think Amanda is a little bit psychic, or just very on trend ;)
Anyway, on to my page!
I had this photo, of Richard (the boyfriend) and I... he's so affectionate, so photos like these are going to be common.. hehe. Anyway, I went through all my patterned papers, and found the base paper, from Kaszazz, and then layered it up with some really old My Minds Eye paper. I popped some doilies down and then clustered embellishments... 
In this corner, I've started with a resin cameo frame, in turquoise... Then added a bunch of flowers, including a large, old fashioned rose, violas and cosmo daisies. I added a paper and resin rose from the grab bag. In this corner, I added a wooden flourish heart, and a bunch of purple rhinestones. 
Ok, so this corner, I started with the other big, old fashioned rose, and layered it up with more violas, daisies and roses. I also added a touch of turquoise in this corner, using a flair button from the washi heart set, and a touch of sparkle, using a sequin heart patch (I love this by the way) I also added more rhinestones, and my title, which is chipboard mini word (gotta love these for 60c each!), which I've left natural. 
I'm really happy with how this page turned out, considering it's very purple! You've got a whole month to play along, so feel free to pop over and have a go... Don't forget the Just Add Paper kits, which are a bargain at $10! 

Saturday, December 21, 2013

Scrapbooking my Birthday!

Hello! I've been in a bit of a creative slump recently, nothing has been interesting me. One of my favourite ways to get out of a slump, like that is to grab some photos, and all my pretty embellishments and do a scrapbook page. 
This page features a photo of me, all dressed up and ready to hit the town for my birthday last month. 
I grabbed my photo, and went through my paper stash. The background paper is from Simple Stories, while the rest of it is by Websters Pages. I didn't really have a set colour theme or anything for this photos, as you can tell, it's quite a neutral photo. 
I then went through my stash of embellishments. I used a polaroid frame (wow chipboard) and layered on top of it a big bloom flower, a flair and a bunch of resin roses and pearls. The Title runs up the side of the photo, and is from Jillibean Soup. 
In the opposite corner, I added a prima flower, more resin roses and some paper flowers from D-Lish Scraps. I also found a tiny silver heart and added it in...
Here are a couple of close ups - 
Life. Paper. Scrapbook - December Colour Challenge

Tuesday, November 19, 2013

D-Lish Scraps - Scrapbook Page - Inspiration Board

Hi Again! I have a scrapbook page to share today, that I worked on today. I have a stash of "selfies" printed up, ready to make scrap pages out of. If you've been following my story, I had weight loss surgery in April this year, I've lost a total of 76kg (167 pounds, in a year) This photo was taken in September, when I was first able to see the changes myself -
I used patterned paper (the kraft one) from Teresa Collins, the stars and flowered ones are off cuts from Echo Park Paper, and are super super old collections! I also used a gold foil doily to fill some space, and the flourish is from Twiddlybitz, which I've covered in white embossing powder.  
In this pic, you can see some paper flowers, a button, a resin rose and a heart pin also, a close up of that delightful foil doily! I also added a small amount of twine, curled in on itself, and a Pink Paislee star.
This corner, near the photo includes the title, made with stickers from My Minds Eye, a flair button and an ampersand die-cut. I added some more twine, paper flowers and Pink Paislee stars. 
I used the D-Lish Scraps Inspiration board as a starting point, using the "nautical" colour scheme, as well as the sketch, but altered it for my own design!

Wednesday, June 12, 2013

Scrapbooking - Washi Wednesday

All washi tape has been reduced to $1.50 for today only! So, pop in store and grab some at this low price, be quick though, some styles may sell out! 
 I've got a scrap page to share today, using some of my favourite products from The Stamp Spot Store! We're featuring Washi Tape creations on The Stamp Spot Blog today, so pop over for a look! 
Here is the main view of the page -
I started out by wrapping three different washi tapes, I used these three - 
*#30 15mm and
the third one I can't find in store, but is similar to this one
I then layered up the photo, and a photo mat from the Sn@p Vintage Bliss 4x6 Paper Pad
I stuck down a Jillibean Soup Sticker (Wise Words) and a mistable Pink Paislee Arrow which I sponged with some blue ink, letting the ink run out towards the end of the arrow. I layered a Finding Nana button on top of a paper bloom and added a 2Crafty chipboard butterfly.
This section shows my title, made from Alphabet stickers, I love the look of mixed fonts, so have used Jillibean Alphabeans and Kaisercraft Mini Alpha. I also added a Remember This sticker, which matched my colour scheme, as well as more paper bloomsSilver glitter paper and a strip of denim ribbon. I added more rhinestones, and another 2Crafty Butterfly.

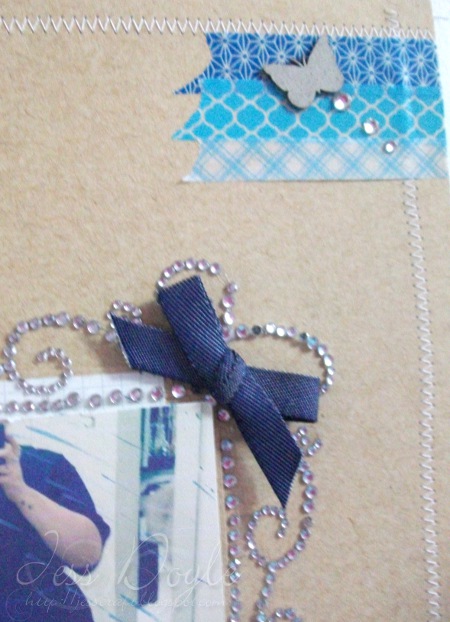
In opposite corners, I added three strips of the co-ordinating washi tape, some more rhinestones and a final 2Crafty butterfly. The corner or the photo has a rhinestone frame and a denim bow. 

Wednesday, May 22, 2013

Some Odd Girl - Wishes

Hi guys! This is a quick (ish) post, that includes lots of yumminess from The Stamp Spot
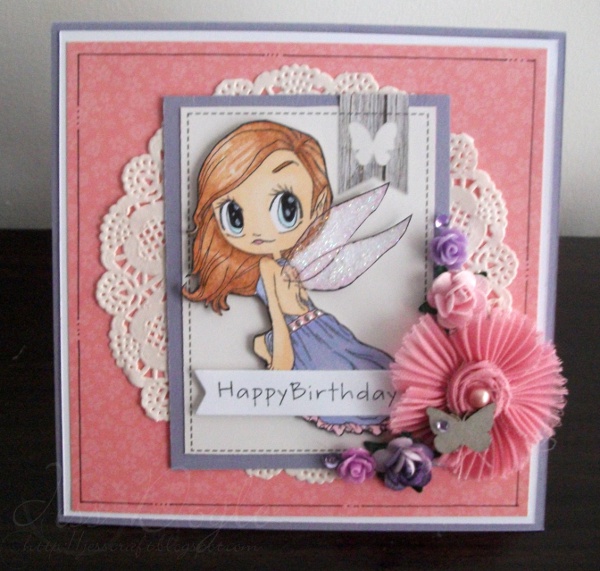
I started by stamping Wishes from Some Odd Girl, and coloured her up using my Spectrum Noir Markers, I then selected my papers... I've used the pink flowered paper from Sn@p Vintage Bliss 6x6 and, the butterfly 3x4 inch tag from Sn@p Vintage Bliss 4x6 card, I trimmed it out, and re-mounted it on purple card, as it was getting lost with pink on pink... I layered a paper doily between the pink and 3x4 card, then added Wishes, a sentiment (from MFT) and then decided this card needed some flowers, bling and another butterfly! I dug through my stash, knowing I had these Prima pleated blooms that would work perfectly for this super girly card. I also used one of these Kaisercraft Amethyst paper blooms and a pink one from my stash. Michelle has recently added chipboards to the shop (which is SUPER exciting!) I used one of the tiny butterflies from 2Crafty, and added a few purple rhinestones. 
Here is the close up -
Some Odd Girl - May Sketch Challenge
sketch2

Sunday, March 31, 2013

Scrapbooking with Kaisercraft - Base Coat

Hi guys!
HAPPY EASTER!
I am spending the day 'relaxing' at home, and part of that was to scrapbook!
I went through a bunch of photos, and found this pair from my nieces 1st birthday party. She's almost 2 now!
I fell in love with the Kaisercraft Base Coat collection, as soon as I saw it! I love the textured backgrounds and how easy it is to "build" a layout from them.... I started off with this textured brick background, and fussy cut the flower section, from a piece of Pink Paislee patterned paper. I then grabbed a Twiddleybitz flourish, and covered it in Heat N Stick Powder, and then a liberal amount of glitter. 
The next step for me was to decide on some embellishments to go below the photos. I chose some lace from Alacraft (this one) and then chose some flowers that have been in my stash for an absolute age! The big pink one is from Prima, and is covered in sparkly pink glitter, and the white one I've had even longer, its a shabby looking rose. It was at this point I also chose the buttons and the last flower for up near the chipboard piece, and attached them all using my hot glue gun.
The banner is from Grace Archival, and is a sticker, it is really thin paper though, so I stuck it on some spare card stock, and popped it next to the flower cluster. 
This last picture shows half my title - and the sparkly & symbol. I used my label maker, as well as some dies to create the title "Miss B & Aunty Jess"
I am entering this into two challenges, the first is the sketch from Stuck?!, which I took inspiration from, and changed it up a little bit... I tend to do that a lot with sketches, hehe
I also took inspiration from Polly!'s Easter weekend Sparkle Challenge!

Monday, November 12, 2012

Scrapbooking multiple photos!

Hello Again! I scrapbooked yesterday! I went through a bunch of my photos, and decided to use four from a day trip to Hunter Valley Botanical Gardens... here is my layout-
I took LOTS of photos on this trip, and wanted to pop them together, so I could see all the beauty in one page. The first image, is the Aboriginal Sculpture, followed by an artsy photo of the palms, a naked lady sculpture (teehee!) and the pergola. I used patterned paper from My Minds Eye, Prima Flower, Rub-on leaves from Kaisercraft, and a flourish that was painted using White Crackle paint... The "pretty" is a stamp from Prima, buttons are from my stash, and the bling behind the flower is from Annmaree :) Here are some closies

I used inspiration from White With One - Green and Chevrons


Tuesday, August 28, 2012

Some Odd Girl - Tutorial - Double Slider Card

Hello! I'm here today, with my post that's just gone live over on the Stamp Spot Blog
Ok, so for the Double Slider card, you will need 1 piece of cardstock, cut to 5.5 inches x 11 inches, two pieces of cardstock, or patterned paper, cut to 3.5 inches x 4 inches, double sided tape, scotch tape, a plastic shopping bag (the grocery kind) a ruler, a paper trimmer, and a small piece of ribbon
Ok, so on the piece of cardstock, score lines at - 2.5 inches, 6.5 inches and 10.5 inches.
Then, using your paper trimmer, or scissors, cut out a small notch on either side of the 2.5 inch piece so it looks like the piece below - 
Get your shopping bag, and cut a strip from it, around an inch wide. Wrap it around the 2.5 inch piece, where the notches have come out, tape the ends to each other, and trim so you don't have a whole lot hanging out. Make sure it is able to spin around the cardstock without too much difficulty. 
This next step, I forgot to take a photo of.... so, have a badly edited picture -
Then place the patterned paper you want to pop up at the top, making sure it all lines up. Turn over this piece and put tape at the top of the plastic bag, and put the patterned paper you want to appear at the base, make sure it lines up with the front one, and looks straight (ish) Attach ribbon pull to the top piece of patterned paper (at the back) 
The smallest scored piece of the 11inch long piece gets attached to the inside and it folds up to look like a card. Here is mine... 
The front, which I have decorated with Some Odd Girl - Hey Kaylee, which was stamped on X-Press It blending Paper and coloured using my Spectrum Noir Markers. I also paper pieced her dress, (wooh polka dots!) The sentiment strip is MFT Die-Namic's Sentiment Strips 
 Here is the card all pulled out. How adorable is the little turtle? He comes with the Hey Kaylee! Set!
I coloured him like normal, and then went back over him with the thin point of the Spectrum Noirs and added a whole bunch of dots to give him some added texture. He is sitting happily on some patterned paper that features Leaves. 
Oh, and have an extra shot of Kaylee - 
The patterned paper all came from a paper pad by Authentique, the paper flowers are a mix of kaisercraft and non-name ones. The cute chipboard frame, is a Tiddleybitz piece from a frames set I picked up at the Newcastle Show.
 I hope you enjoyed my tutorial :)
Thanks for dropping by! Don't forget to enter your cards/scrap pages/BTP items into this months challenge spots -