Showing posts with label RICH RAZZLEBERRY. Show all posts

Thursday, February 28, 2013

Stampin' Up! Friends Never Fade

Hiya! I have another card to share today, that doesn't feature my coloured people stamps!!! I'm trying to re-broaden my crafty horizons, and stretch myself a bit... So, here it is -
I started with a plain piece of Very Vanilla card, faintly drew a curving line, and stamped the flower images from Friends Never Fade, and the circle from Just Believe, in a range of inks - Baja Breeze, Certainly Celery, Wisteria Wonder and Rich Razzleberry. I then zig zag stitched around the edge, and embossed another piece of Vanilla, and attached it. The main image panel is the "sentiment stamp" from Friends Never Fade, and I have cut around it. To finish off the card, I used a bit of stickles on the main image panel, the last Razzleberry flower on the right and the first Wisteria flower on the left.
Here is a close up - 
I was inspired by the Moxie Fab Tuesday Trigger, and took the colours, texture, stitching and theme of flowers/circles. The Tuesday Morning Sketches had me thrown for a bit, but I think I've made it work, with a rotation... And, to top it all off, I'm popping this into the Anything Goes Linky at Simon Says Stamp
I have popped a few cards into my Madeit Store, as well as keeping everyone updated on my Facebook Page (check to see if you're the giveaway winner!) 

Monday, June 4, 2012

Dancin Mae and Spectrum Noir Markers, Feeling Sketchy Week 8

I received a big old parcel from Michelle at The Stamp Spot and it included my newest toys.... Spectrum Noir Markers!
I bought all the sets that Michelle had... I'd heard so many lovely things from Annmaree about the Spectrum Noirs that when I found out that Michelle was going to stock them, I knew I had to get them! They arrived on Thursday before I went to work, so I had a play.....This was my first attempt at colouring
Ok, so its not overly good, but I was impressed with how easy they were to use! I wasn't discouraged, and Thursday night picked them up again and coloured this one - 
I started by picking out the patterned paper from my 'scrap stash' I think it is from My Minds Eye. I coloured up my Dancin Mae with my markers (sorry, I didn't pay attention to the numbers) and cut her out. I popped her onto a nestie label and popped it onto some dimensionals on to the patterned paper, and embossed white card (that was also in my scrap stash, almost made it into the bin...)  I tied a bow using some leftover white satin ribbon and added three little bright pink rhinestones. I layered the whole shebang onto a piece of Rich Razzleberry cardstock. 
This card is my DT post for Feeling Sketchy this week - 
We'd love it if you could pop by and play! We've got a new sponsor this month, ScrapEverything!
scrapeverything.com.au

Thursday, April 26, 2012

Hey Kaylee (Some Odd Girl) Card

So, it's my time to play again at The Stamp Spot, so here is my card -
I used some patterned paper from Basic Grey called Cherry Cobbler, and took my colours for colouring Kaylee from the paper. I coloured Kaylee, from the Hey Kaylee stamp set using my watercolour markers and cut her out (fiddly process.) I stuck the patterned paper onto some glitter cardstock and wrapped some stitched brown ribbon around, tying a bow. I stamped the Lawn Fawn Chevron Backdrops onto some white card stock, and the sentiment from the Hey Kaylee stamp set. I finished this card off by layering it on to a rich purple card stock, and rounding the top right hand corner. 
This card can be used for the April Spots, her eyes as the ovals (ok, so I'm stretching it a bit....) the brown for her hair and stitching in the ribbon :)
I am also entering this into the Ribbon Carousel Anything Goes challenge, as well as the Simon Says Stamp Anything Goes challenge as well.  

Monday, April 16, 2012

Feeling Sketchy Week 3 - Mother's Day Card

Hi again! I have my next card for the challenge blog Feeling Sketchy go live this morning, but, because I had to go to work, I didn't get a chance to post it, until now
A plain white card base, layered with Basic Gray and paper by My Minds Eye, beautiful Satin Pleated ribbon from the Ribbon Carousel and a stamp by Paperific, stamped, and coloured with my Stampin Write Markers, in Rich Razzleberry, Pool Party and Lucky Limeade. I popped it up on dimensionals and added some light pink rhinestones to finish it off.
Check out what the other Sketchettes made for this sketch, and have a play along!
F-Sketchy 3
Thanks for dropping by!

Saturday, March 24, 2012

Some Odd Girl, Dancing Mae and I create a fun card!


Hey Hey,
I know I've been quiet over here in blog land.... But, a lot has been happening behind the scenes.... I had a uni assignment due on Friday, and some exciting news is coming.... I was approached by an awesome crafty girl who lives in Victoria to discuss opening up our own sketch challenge blog.... Our site, Feeling Sketchy will go live on April 1st (no April Fools!)... We have put together a small, but awesome design team and can't wait to get started... so pop on over and have a looksee... Meanwhile, I do have a card to share...
This is my first time colouring Dancing Mae, and let me tell you... she is the easiest, most fun little chick to colour! I used my Stampin' Write Markers, and a Blender pen and then when I was done colouring her, cut her out and stuck her to a white nestie and then a Marina Mist nestie. Behind the Marina Mist shape, I have popped three Rich Razzleberry ribbon loops, the main image panel is attached with dimensionals, atop some patterned papers from My Minds Eye and KaiserCraft. I stamped the sentiment using alphabet stamps and on the inside, it has 'like no-one is watching' 
I am entering this into two challenges. The Play Date Cafe colour challenge and the iSpy Sketches challenge
 
 
Thanks for popping by :)
Jess

Sunday, November 20, 2011

Stampin' Up! Contempo Christmas, French Foliage and The Best is Yet to Be combined to make a Christmas Card

Hi guys! It's been a super busy week, as work has asked me to come in 4 days a week instead of my usual 2, and on the midweek break that I usually have, I had stamp club, so all craft had been put on hold... I got into the craft room last night though, and made up this card
I have used a Crumbcake (Kraft) base, which has a piece of Not Quite Navy card stock, which I have run through the Big Shot using a new embossing folder (for me anyway), called Stripes. I then got a piece of Vanilla card stock which I have stamped the little leaf from French Foliage in Old Olive, and then stamped the ornament from Contempo Christmas in Not Quite Navy and Rich Razzleberry. I then drew a border using my black Stampin' Write Marker and a ruler. The sentiment is from The Best is Yet to Be, and has been stamped in Rich Razzleberry. I mounted it to a scallop circle of Old Olive, and punched some tiny holes in the petals. 
I am entering this into two challenges, the first is the Freshly Made Sketches challenge, and then into the Embellish Magazine colour challenge, which also must use Leaves
Thanks for dropping around! 
Don't forget, that my Blog Candy finishes on Thursday!

Monday, October 10, 2011

Stampin' Up! Delicate Doilies and 2 Step Bird Punch create a Birthday Card

Hi Again!
I have a super bright birthday card to share with you today :)
This is a white card base, layered with pieces of Island Indigo, Melon Mambo, Rich Razzleberry and Wild Wasabi. I stamped these pieces in VersaMark using Delicate Doilies and the Medallion Background stamp and then embossed them using white embossing powder. I then cut a piece of Marina Mist and layered a piece of white on top, I stamped the sentiment (from Upsy Daisy) and then using my 2 step bird punch, cut out the bird in the same colours as the background. A little bit of twine finishes off this card. I am entering this into the Card Patterns Sketch
Thanks for dropping by! 
I have another card to show you, a much more CAS card, so be sure to come back a bit later :)
Happy Stamping!

Saturday, September 17, 2011

Stampin' Up! Party this Way and Brights Designer Series Papers make a fun Birthday card

Hi guys! I have made two cards yesterday, but didn't have a chance to share them with you.... here is the first one...
For me, this card isn't a favourite, and I don't actually know why.... I love the bright colours, with the splash of black, but I just feel it didn't come together as it should have in my head.... On to the details though...
I used a Vanilla piece of card, and layered on some designer series papers from the Brights stack in Old Olive, Tangerine Tango, Daffodil Delight, Real Red and Rich Razzleberry. I stamped the candles from Party this Way and cut them out using my circle punch. I stamped the sentiment and popped in underneath the circle. A touch of ribbon, and some bakers twine finishes off this card.
I am entering this into the Lollipop Ladies challenge, which has it's inspiration as Everlasting Gobstoppers :)
I took my inspiration from the colours mostly, and the circles in the polka dot paper and candles.... 
I also took inspiration from Got Sketch?
Thanks for dropping by, I'll be back in a bit to share another card, one I'm happier with :)

Wednesday, September 14, 2011

Stampin' Up! Awash with Flowers and I create a Just for You, all occasions card

Hi all! At the moment, I'm trying very hard to get used to this new blogger format, and it is very difficult! I'm not sure I like it, but it is change after all! I have crafted tonight, so I do have a card to show you, not just my ramblings :)
Ok, so fairly basic here... a Basic Grey 4.25" Square card which I have layered Rich Razzleberry onto. For the main image panel, I have randomly stamped images from Awash with Flowers in Old Olive and Rich Razzleberry with outlines in Basic Grey. I mounted the image panel on top of the Rich Razzleberry layer and then stamped a sentiment from The Best is Yet to Come (a retired hostess sentiment set) in Basic Grey, cut it out using my circle punch and layered it on an Old Olive Scallop Circle. I added a piece of retired Kiwi Kiss ribbon (I don't have any Olive ribbon!) to finish of this card. 
I am entering this into 2 challenges tonight, the first is The Paper Players colour challenge, which was surprisingly easy for me, usually I struggle a bit with purples :) The second challenge is the new challenge blog Freshly Made Sketches which has a sketch this week
As always, thanks for dropping in, it makes my day seeing all the lovely comments you guys leave me :)
Happy Stamping!

Tuesday, September 6, 2011

Stampin' Up! Tiny Tags, and Scallop Rolled Roses on a cheery Hello card

Hi again, tonight after making dinner, I headed into the craft room, and struggled (a lot!) to make a card I was happy with... but, eventually I succeeded...
I started off knowing I wanted to use the newest sketch from Card Pattens, but little else. I didn't know what I wanted to go in the circle element, what colours, embellishments or even stamps that I wanted to use... So, after a bit of experimenting, I decided to colour this darling little girl from My Favourite Things, and paper pieced her top. I then figured as I'd paper pieced, I knew I could enter it in to The Lollipop Ladies challenge, so I took inspiration from the cupcakes, pulled out some Crumbcake card stock, made a card base layered some Rich Razzleberry and Tempting Turquoise for a fun colour palette, while not being the same as those in the cupcakes gives me the same fun impression... I rolled some scallop roses, and one out of a circle, which I have posted a tutorial to here, and cut out a little leaf using the Bigshot and Little Leaves sizzlet. I used Tiny Tags and matching punch to create a sentiment and popped it just behind the roses, peeking out. A row of rhinestones finished off this card nicely... I am also entering this in the Simon Says Stamp and Show Stamptember hop!
Thanks for dropping by, 
Happy Stamping!

Thursday, July 21, 2011

Stampin' Up! Sweet Buttons Embossolit and I create a fun note card

I have jumped back into my clean and simple cards this evening, this idea has been floating in my head since late last night....
This is a fairly basic card, it consists of a Basic Black base with Whisper White layered on top, I started by stamping the sentiment which is a cute one from KaiserCraft, then I drew a border using my Black Stampin' Write Marker... Then the Bigshot came into its own... I had a bunch of scraps in my scrap drawers and I ran each colour (Real Red, Pumpkin Pie, Daffodil Delight, Pear Pizzazz, Pacific Point, Rich Razzleberry, and Regal Rose) through the Bigshot using the Sweet Buttons Embossolit... it cuts and embosses at the same time, and is only available until the 31st of July, when the Mini Catalogue ends... 
I am entering this into two challenges, the first is the Less is More Circles challenge, and the second is the Colour Throwdown Rainbow Challenge. 
I think that's all I needed to tell you this evening, so until next time...
Happy Stamping!

Tuesday, July 12, 2011

Stampin' Up! Pun Fun makes Childrens Cards Easy!

I've had a busy few days, and with Stamp Club coming up on Wednesday, it is set to be a good week! I have been struggling for a little while as my mojo seems to have deserted me, perhaps because it is so cold in my craft room compared to the rest of the house... I have borrowed a stamp set from my mum, and wanted to play with it a little more before returning it tomorrow... Here are some clean and simple cards for you
Ok, so this first one is using the cutest little rocket ever! It is from the Pun Fun stamp set, and is coloured using my Stampin' Write Markers in Pumpkin Pie, Pacific Point, Tempting Turquoise, Daffodil Delight and Sahara Sand. You probably can't see it in the picture, but the window has been glossed using Crystal Effects. For both cards, I have used the Confetti White card stock to add a little bit of interest.
This little hippo has to be my favourite stamp from Pun Fun, she looks so happy! I have coloured her again using my Stampin' Write Markers, in Sahara Sand, Melon Mambo and Rich Razzleberry. Her balloon has a small amount of Crystal Effects to make it shiny. I am entering this little hippo card in the Less is More One Layer "Legs" Challenge. 
Have fun and Happy Stamping!

Sunday, June 19, 2011

Stampin' Up! Medallion and Vintage Vogue paired together to make Friendship Cards

Hi Again! I have been on a roll recently with my cards, and last night I had to make one more before bed.... I had been thinking of this one for a couple of hours before making it.....
For this card, I knew I wanted to play with this lovely F from Vintage Vogue, and also the Medallion background stamp that my mum recently gave me. I have stamped the F in Basic Black and then masked it off and stamped the Medallion in Rich Razzleberry, tied a ribbon around the base, and mounted the white cardstock to a Basic Black card base, while I was sitting deciding if I was done, I grabbed a few rhinestones and popped them around the circle of the Medallion. 
I am entering this into the Less is More Monogram challenge, which scared me at first, as I don't own an alphabet set yet, but, I realised I have a few stamps that will work. Keep an eye out, I've got another on brewing in the back of my mind.... 
Thanks for dropping by
Happy Stamping!

Monday, June 13, 2011

Stampin' Up! Party This Way makes fun birthday cards!

It's been a few days since I have blogged, I have wanted to craft but haven't had the motivation to get in to the craft room, I've also got a few cards that I need to blog sitting on my desk... I think it's time to clean out the craft room again, and the perfect excuse is we need the room for a visitor this week, so today and tomorrow, I'll be cleaning up.... But last night, I created...
My Aunt has asked me to create some 18th birthday cards, but I've been finding it quite difficult... This one layer card is Whisper White, stamped with my trusty Party This Way stamp set... the candles are Melon Mambo, Rich Razzleberry and Tempting Turquoise, all with Daffodil Delight flames, coloured with my Stampin' Write Markers. I have hand drawn a border using my Basic Gray marker, and then stamped the Happy Birthday (also from Party This Way) in Basic Gray. I actually really struggled with this card, I kept thinking more needed doing, or that my border wasn't right, but now looking at well rested, I'm glad I left it alone...
I am entering this into the Less is More challenge blog which is for a one layer card that is "Framed". I was a bit slow entering this weeks challenge, usually I'm one of the first 100 to enter.... 
Anyway, I'll be back later to share a wedding card I made.....
Until then,
Happy Stamping!

Thursday, May 19, 2011

Stampin' Up! Shimmer Paint is beautiful in the Faux Mother of Pearl Technique

I have been seeing quite a lot of Faux Mother of Pearl happening around blog land recently, so when I saw my upline Linda Higgins was hosting a class on this technique while I was on the Central Coast the other night, I had to drop in and learn how to do it myself. Here are the cards we made
This was our first sample, it is ATC sized, about 2.5" x 3.5", we have Always Artichoke as the base, then layered Rich Razzleberry and gloss cardstock, which has been given the faux mother of pearl treatment, with Soft Suede ink and White Shimmer Paint. The image is from Nature Walk, which is available in the current Autumn/Winter Mini Catalogue
Next up, this one, which is a great masculine card, it uses Early Espresso as the base card, followed by a Crumbcake piece, which has been embossed with the Tulips Embossing Folder through the Bigshot, and another piece of Always Artichoke. The image for this one is from Lovely as a Tree, and has been given the same treatment as above, except we used Crumbcake ink with the shimmer paint. The picture below might give you a slightly better view of them image panel.  
This one was my favourite of the night. We used Night of Navy through the Bigshot with the Tulips Embossing Folder again, then for the image panel, we die cut the Top Note out and made it Mother of Pearl using Baja Breeze ink. Once it had dried, we stamped the flower image from Elements of Style and coloured it with blender pens and Night of Navy and Old Olive ink. A little bit of Organza ribbon finished this one off. Once again, have a look at the close up below.  
I really enjoyed meeting Linda's friends and customers at her class, and look forward to all she can teach me. If you'd like to learn one of these cards at a class or workshop, why not give me a call on 0405 173 237 or shoot me an email and we can organise a time and day that is suitable for the both of us. 
Until next time,
Happy Stamping!

Thursday, May 5, 2011

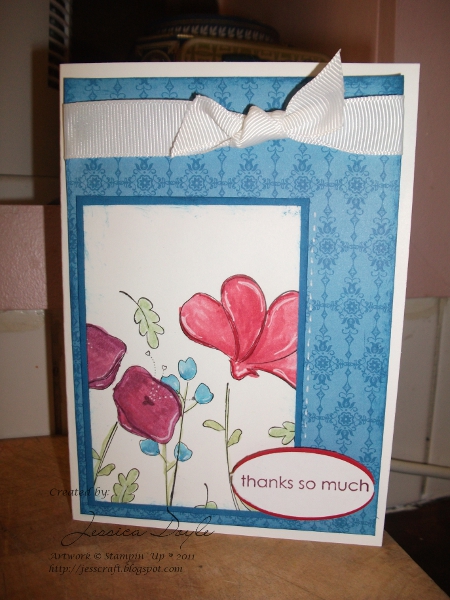
Stampin' Up! Awash with Flowers and I create a Thank You Card

Just a quick one before I head to bed....
This card was made tonight, purely because I was bit annoyed, and water colouring helps me deal with stress, I must admit, it is something I need to improve upon, as my technique isn't very good (read non-existent), so although it relieved the stress, I'm not overly happy with this card... I have used the 2 step stamping set Awash with Flowers, which comes with outlines and a solid stamp, but, for this, I have used only the out lines.  I coloured the images with my Aqua Painter and my Stampin' Up! ink pads, in Wild Wasabi, Pacific Point, Real Red and Rich Razzleberry. I have also used the Stampin' Up! Designer Series Paper Stack in the Brights collection, which is a great buy at only $37.95 for 40 sheets, what's even better, is it matches with all the Stampin' Up! colours perfectly!
I am entering this into the Stampin' Royalty colour challenge, 
I think I will have another play with these colours at a later date...
Thanks for stopping by, and as always, 
Happy Stampin!

Thursday, March 31, 2011

Stampin' Up! Apple Blossoms and I make Birthday Cards

Hello all again, this was another card Sue, Kim and I made on our craft day. We sit down surrounded by all our lovely Stampin' Up! products. This was a colour combo I came up with, Rich Razzleberry, So Saffron and Red Riding Hood. I cringed at my choices, but so did the other girls.....
This set is just too cute! It is a special gift to our hostesses who hold a Stampin' Up! workshop of $600 or more, they can choose this stamp set. I love it, and it is definitely on my wish list. I have added a little bit of Pear Pizzazz to this card for the leaves and stems, but, still love how it turned out. 
If you would like to host a workshop, and have the chance to get your hands on this stamp set, shoot me an email to jessidee86@gmail.com, or give me a call on 0405 173 237.

Wednesday, March 23, 2011

Stampin' Up! Sale-a-bration So Happy For You makes fun Birthday Cards

Hi all,
I have something crafty to show you after a short hiatus. I have a male friends birthday coming up, so I needed to make a card.
Now, this isn't a typically male card, but I think my friend will like it. I have used a few inspiration spots for this one, the first being the colour challenge over at Just Add Ink, the masculine challenge over at Less is More, and the birthday challenge over at SUOnly (which was incidental). I used the Sale-a-bration set So Happy for You, and stamped the star image using Crumb Cake, Old Olive and Rich Razzleberry. I embossed the bottom half of the card using the Big Shot, and stamped the sentiment in Rich Razzleberry, a little bit of Whisper White Grosgrain finishes this card off.
Don't forget, you have 1 week left to get this stamp set for free! All you need to do is spend $100 or more, and you get to pick one of the Sale-a-bration sets for FREE, so, it's time to fish out your wishlists and get ordering! Call me on 0405 173 237 or shoot me an email
Until next time, 
Happy Stamping!

Monday, March 14, 2011

Stampin' Up! Ornate Blossom is very versatile, Christmas Card and Thank you Card

Ok, so this is another couple of cards from our craft day last week. This time, the colour combo was one I struggled a little bit with.... So Saffron, Elegant Eggplant, Rich Razzleberry, Wild Wasabi and Early Espresso. 
So, I clear embossed the damask pattern from Bliss on the Early Espresso cardstock, then coloured the ornate blossom with my stampin' write markers, then stamped it on to some very vanilla. I wanted to add some depth to the colours, so went over selected parts with my markers for definition. The sentiment is from Short and Sweet (one of my all time favourite sentiment sets) and is cut out using the Modern Label Punch. The ribbon is retired SU, Wild Wasabi. 
Ok, after making these cards, Kim and I sat looking at the Ornate Blossom stamp, thinking, there has to be more that we can do with this.... Kim was looking at the stamp upside down, and brilliantly noticed it looks like a pine cone.... So, we moved on to doing a Christmas card each. This one was not colour combo'd at all, just use the stamp...
I chose to use Cherry Cobbler, and Whisper White. I embossed half the White with the Polka Dots Embossing Folder, and left the other half un-embossed. The image was stamped using Cherry Cobbler, and then I glued down some loose silver glitter. The ribbon is non-su, but is a perfect match for Cherry Cobbler. The sentiment is from Snow Swirled, and I think fits perfectly. 
Check out what Kim did with the colour combinations, and this stamp set! Next time you have a stamp that doesn't seem to work, look at it from another angle, you may find something surprising...
Happy Stamping!

Thursday, February 24, 2011

Stampin' Up! Look Who's Turning makes adorable kids cards

I had a great day today! I had a craft play date with one of my team mates, and friends Kim, (who by the way is fabulous!) I had a few challenges to catch up on, so I made a few cards, including this one....
I bought this stamp set a little while ago, but amazingly, had only used the sentiments in it! So, I cracked out the un-inked stamps and created this adorable kids card.
The challenge I am entering this into is the Colour Q challenge, which was to use the below colours
As usual, I struggled with this challenge, I find it quite difficult to include more than 3 colours in a card, so when I saw this, I freaked a little bit.... I wasn't actually going to participate, but I'm glad I bit the bullet and joined in. 
Happy Stamping,
Jess