Showing posts with label 3D PROJECTS. Show all posts

Wednesday, January 1, 2014

Alacraft - My Masquerade Mask - New Years Eve 2013/2014

Hi guys! It's time for my monthly post, for Alacraft!
Don't forget that just for being a blog reader, you get a 20% discount, just use the code JESS20 
Also, the $25 craft give-away happening every month, pop your name in the draw here!
Anyway, this month, I'm showing you a project that I made up, for New Years Eve!

I started out with a plain black mask which I picked up at spotlight. I glued down some lace, which is this one, from Alacraft. I then grabbed some rhinestone diamantés and popped them on around the eyes. 
Here is the side view, to show you the details -
I used my hot-glue gun to attach a bunch of craft flowers, including this one and this one. I added some hat elastic and wore it out! 
I loved putting together my mask, and got quite a few compliments on it... 
Here is a picture of me wearing my mask (with my best friend)
And, this is the other mask I ended up with, at the end of the night - 
IRON MAN!
Word Art Wednesday - Anything Goes #113

Tuesday, September 4, 2012

Off the Page Project - Dressy Anya

Hello! I'm back today to share a quick project I made up last night... I was sick of looking at my pre-stamped images box and wanting chocolates. My box looked like this - 
An old Whitman's Sampler box... It was definitely time for an overhaul! Here's what I did -

I covered the entire box in white copy paper using double sided tape. I removed the top and bottom larger pieces of card from the box, and wrapped them separately so I was able to cover the overhang as well. I then glued down a piece of white cardstock on to the top and started decorating. I embossed another piece of cardstock, and put that down in the middle, added a crochet doily and some bling before adding some ribbon, button and flowers. The main image is one of the Dressy Anyas coloured up with my Spectrum Noir Markers.  
The alphabet stickers are from Kaszazz. When I was done assembling all the bits and pieces, I went over parts of Anya with some diamond stickles. 
I am entering this into three challenges, the first is the Anyone for Anya? Anything but a card challenge, next up is the Farm Fresh Friday White Out challenge, and last but not least Simon Says Stamps Anything Goes Challenge

Sunday, January 1, 2012

KaiserCraft Large Desk Organiser

Now for something completely different hey? One of the craft groups I've joined on Facebook had one of these shown and I thought to myself, that is something I'd use.... So, here it is
I made up the draws themselves using my hot glue gun and some papers from Kaisercraft, from the Hippy Girl Collection. I then put a layer of wood glue over the top and let it dry. I had those done 2 or 3 weeks ago... then, I got distracted... Yesterday, I went to the shops, and purchased some white gloss spray paint, and today I sprayed it. I think if I was going to do another one, I'd get a paint brush out to paint the unit itself, as I didn't like the control (or lack of) I had with the spray paint. Once it was dry, I did get the paint brush and some acrylic paint to patch it up. Then, it just came down to filling it :)
The bottom drawer has my staz-on, versamark and other ink pads. The smaller drawers contain my 3 Distress Ink pads, rhinestones and sticky notes in one and the final one has dimensionals in it.
I love how it turned out :)

Tuesday, December 13, 2011

Scrapping & Life Blog Candy Giveaway!

It's not very often that I post about someone giving away blog candy, but one of the nicest people I know, Alanna is trying to reach 100 followers! Her blog Scrapping and Life is wonderful for a bit of inspiration. Her cards, layouts and beyond the page projects are layery goodness that I struggle with, but admire no end...
Have a look at the awesome candy she is giving away!
Thanks for stopping by, and head over and have a look!

Tuesday, September 27, 2011

Stampin' Up! Delicate Doilies and Newsprint Designer Series Paper decorate a 3D Letter

Ok, so I promised I'd be back with something different to show you, not just another card or scrapbook page.... and true to my word, here I am....
My mum gave me a Papier-mâché J for my birthday last year, for me to decorate, she knows me well :) But, it has been sitting on my shelf for almost a year looking at me, I couldn't decide what I wanted to do with it... So, the other day I painted it cream in preparation of doing "something" with it... Here is how it ended up
I laid the J down and drew around it on some Newsprint DSP (retired) and cut it out using a sharp pair of scissors. Once it was cut out, I stamped randomly the doilies from Delicate Doilies in Calypso Coral, Early Espresso, Pool Party and Island Indigo. I then covered the whole thing in a thin layer of Crystal Effects, using a paint brush to spread it. I set it aside to dry for around 3 hours. Once it was dry, I tied a piece of ribbon around the "stem" of the J. I am really happy with how this turned out, and it's taking pride of place on my display shelf :)
I am entering this in to the Wee Memories patterned paper challenge.
Thanks for dropping in :)
Happy Stamping!

Wednesday, August 24, 2011

Stampin' Up! Snow Swirled, Tree Trimmings, Dasher and Contempo Christmas create a Vintage Star Album

Hi Guys, I should warn you all now, this is going to be a picture heavy post.... I have created a Christmas mini star album for an international holidays swap... luckily, I only had to make one!
So, this is the front, I used a piece of backing card you get when you order a pack of designer series papers. The album size is 4 inches square. I have covered the backing card using the Newsprint DSP, and inked the edges using Crumbcake. I stamped Dasher is Soft Suede on Very Vanilla, and mounted it on Suede. I added a rhinestone for his nose. The ribbon is non-Stampin' Up! and is almost a perfect match for Cherry Cobbler.
This is just to show you a different angle, the pages are Cherry Cobbler, followed by Soft Suede and Very Vanilla... Now the insides:
I sponged all the Vanilla pieces with Crumbcake, and purposefully left some of the pages blank, so my swap sister can insert photos, or journalling.
 
Other pages, like these ones, I filled with a Christmas quote or picture that I thought was really nice

 
This page, (below) is  probably my favourite...
 
 
Sorry about my fingers in these, the pages wouldn't sit open by themselves... 
 
 
I used only 5 stamp sets and 4 colours to create this entire album, Dasher, Snow Swirled, Contempo Christmas, Tree Trimmings and a Hero Arts stamp I don't remember the name of... The colours are Soft Suede, Crumbcake, Cherry Cobbler and Very Vanilla. Here is a look at the album open, with all the pages showing.
Thanks for stopping by!
Happy Stamping


Monday, April 18, 2011

Stampin' Up! Eat Chocolate makes adorable Easter Gift Bags

Last week, I had a craft play date with wonderful people, Sue, and Kim (sick of hearing their names?) One of the projects Sue showed us how to make is this really cute bag
This bag is made out of two A4 pieces of cardstock, when scored and adhered correctly, will fit a 200 gram block of chocolate in it.... For Easter this year, I plan on making a few more of these, and popping blocks of chocolate in them.... I have used the Autumn Spice Designer Series Paper out of Stampin' Up!'s current Winter mini catalogue, paired with Early Espresso, Not Quite Navy, Cherry Cobbler and Old Olive. Head on over to Kim and Sue's blogs to have a look at their takes on this little bag

Saturday, April 2, 2011

Stampin' Up! Artistic Etchings and I create Pizza Boxes

Hi all!
I've got a tutorial to share with you this evening. A totally cute pizza gift box. (Don't forget, you can see all my tutorials here)

Supply list:
Cardstock 1 piece cut at 6"x11" 
Designer Series Paper cut at 3.75" x 3.75" and 0.75" x 3.75"
Strong Adhesive (I used Stampin' Up! Sticky Strip)
Scor Tool.
-------------------------------------------------------------------------------------------------------------
Instructions:
1. Score your cardstock at 1" and 5" on the short side.
2. Turn your cardstock long ways and score again at 1", 5", 6" and 10".
3. Cut along the score line at the corners and in the middle. 
4. Fold along all score lines, and adhere tape to the corners being folded in.
5. Adhere edges, and decorate. 
I have used Crumbcake, Early Espresso, Very Vanilla and Peach Parfait to decorate my pizza box. I have also used the designer series paper from the Stampin' Up! Newsprint collection, which has been sponged with Peach Parfait, Crumbcake and Early Espresso.  I am entering this into the Just Add Ink, Just Add a Box or a Bag Challenge.  
This little box only took about 10 minutes to actually construct, the time consuming part for me was decorating... 
Thanks for looking, and as always, Happy Stamping!

Tuesday, March 22, 2011

Stampin' Up! Classes and Winter Mini Launch - Newcastle Area

Just a quick post to let you know about some upcoming events. The first is a cardmaking class, which will be held on the second Monday of the month starting in April. This class will be held in Glendale. Get in quick though, as places are being booked quickly!
The second is the launch of our new Autumn/Winter Mini Catalogue on the 16th of April at Cardiff South. Three projects will be made using products from the new catalogue. Prize draws will take place, and lots of fun will be had! Book in today, as places are limited

Friday, February 18, 2011

Stampin' Up! Bliss Gift Box

I sat and played in my craft room last night, catching up on some inkiness... I think I'm in a bit of a mojo slump at the moment... even though I've got bunches of wonderful things I want to use, nothing is happening that I love... *sigh*..... I did make this last night though, and while it is okay, it just doesn't jump out at me...


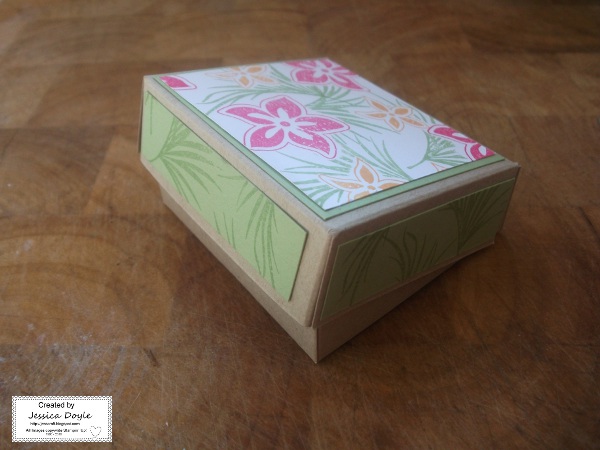
This little box would fit a number of cards and envelopes for a friend or relative who is short on time... (which is always an awesome gift!) or fill it with chocolate, or a small gift, and give it that way.... 
I used the Just Add Ink Sketch for this, but turned it on its side. I also used a template from Stamping 411 for this project. I'm going to have another play with this idea today, and see what I come up with.... 
Hopefully my mojo will return, until then... Happy Stamping!

Saturday, February 5, 2011

Exploding Purse Gift Bag

Hi all!
I found a wonderful tutorial online tonight, and thought I'd use it to make something! I'm thinking of filling it with some small sized bottles of moisturiser, or something, and sending it to some one special!


I used the colours from the Colour Q Challenge,  but once again, there was a retired colour that I don't have, so I substituted with Regal Rose, I don't think it looks right... but it was the closest I had....
Anyway, thanks for looking! I hope there aren't many more pink colour challenges! Kids colours would be awesome!

Sunday, January 9, 2011

Another UStamp Project!

I'm back again with another UStamp project! This one I've been looking at for a few days... trying to figure out what I want to do with it... Not that the project Tammy created wasn't beautiful, unfortunately the stamp set she used has not been released in Australia yet.... *sad face*
Anyway, unbelievably, this entire project came out of one 12x12 piece of cardstock! Unfortunately, I cannot show you how on my blog, but go join UStamp, if only for this wonderful project!


Something else that is awesome is this Colour Coach online that I found today! I used one of their suggestions to create my colour palette for this project... Go, have a play and find an awesome colour combo!